 cricut setup maker
You have come to the right place if you want to create Cricut wood signs with your Explore 3 machine. During my long career as a professional crafter, I have made a plethora of wood crafts for both personal and professional use. Apart from this, I train aspiring crafters to enhance their crafting skills and excel as professional crafters. As a result, I have curated this blog to guide new Cricut crafters like you through the full process of creating wood crafts.

In addition, creating a custom sign requires understanding the machine setup, essential supplies, and the process of using it. Once you finish reading, you will understand everything. So, without wasting much time, let’s jump into the right content.
The Process to Setup a Cricut Explore 3 to Your Device
Before we start creating the Cricut wood signs, it is necessary to complete the machine setup process. Below are the steps on how to do it.
- Initially, you have to turn on the Cricut Explore 3 machine.
- Then, connect the cutting machines to your computer or smartphone via USB/Bluetooth.
- Next, go to the Cricut website or app downloader to install the Cricut Design Space app.
- Once the Cricut app installation is complete, then sign into your account using the Cricut account details. (Also, you can click on the Create Cricut ID to make a new account if you do not have an account)
- After that, click on the New Machine Setup option to connect your Explore 3 machine.
- Now, the machine will search for your Explore 3 machine and show it on the result.
- Once you select your machine then the connection process will be complete.
- Lastly, you can start creating a DIY wooden sign project with the machine.
Essential Supplies for Creating a Wood Sign On Cricut Explore 3
If you want to create the Cricut wood signs, then first, you have to gather the below mentioned tools and supplies.
● Cricut Explore 3 cutting machine
● Cricut Design Space app
● Scraper & Weeding tools
● Smart vinyl
● Painter’s tape and Transfer tape
● Primer and Paint (To paint the background and lettering.)
● Wood Stain
● Board
● Wood Glue
● 1 1/4″ Brad nails
● Masking tape, etc.
Steps to Create a Wooden Sign With Your Cricut Explore 3
Once you have got everything you require to complete this DIY project then you can move with the process to make it. Here is a complete step-by-step guide to making Cricut wood signs.
Step 1: Cut the Lumber According to Your Wood
- You can take the lumber for sign baking. (I am using the 2 ft x 4ft plywood board cut to 18 1/2″ x 31 1/2″)
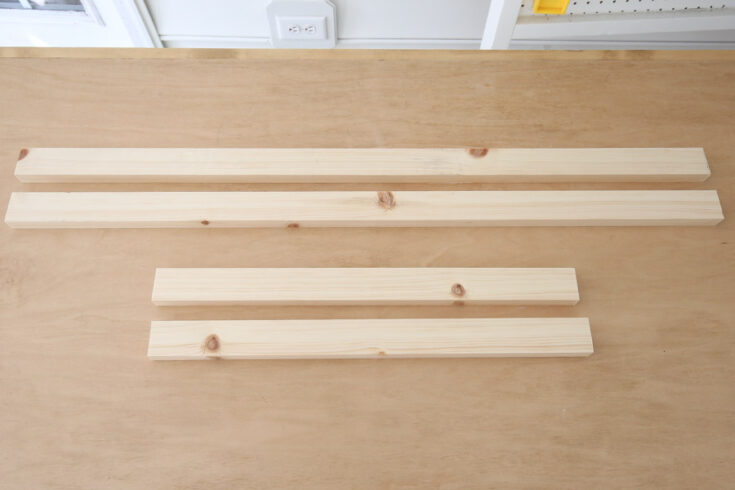
- Use the table saw or circular saw to cut the lumber.
- I am cutting the two boards at 18 1/2” and two boards at 33.”
- After that, you have to strain the 1×2 boards.
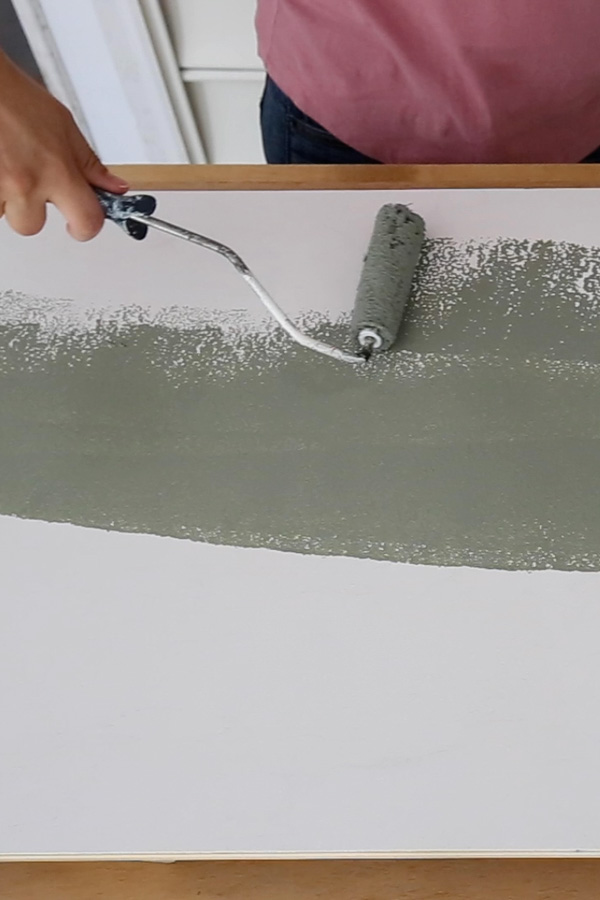
- With the help of the paint color, the backing board of the wood sign. (Also, leave it to dry for at least 24 hours.)
Step 2: Create a Stencil With Your Cricut Explore 3 Machine
- Open the Cricut Design Space app on the device to which your Explore 3 cutting machine is connected.
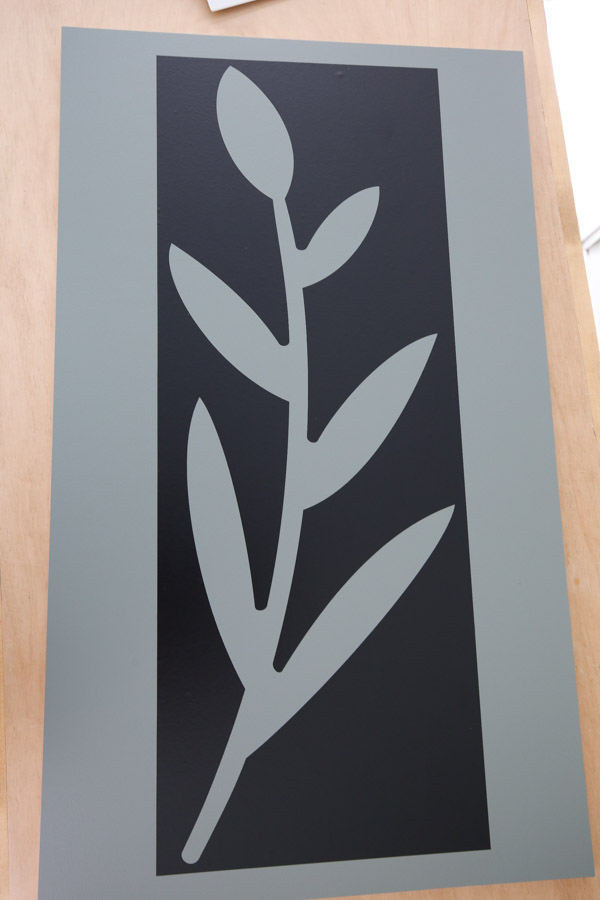
- From the Images section, choose the design you want. (I am using the plant leaf.)
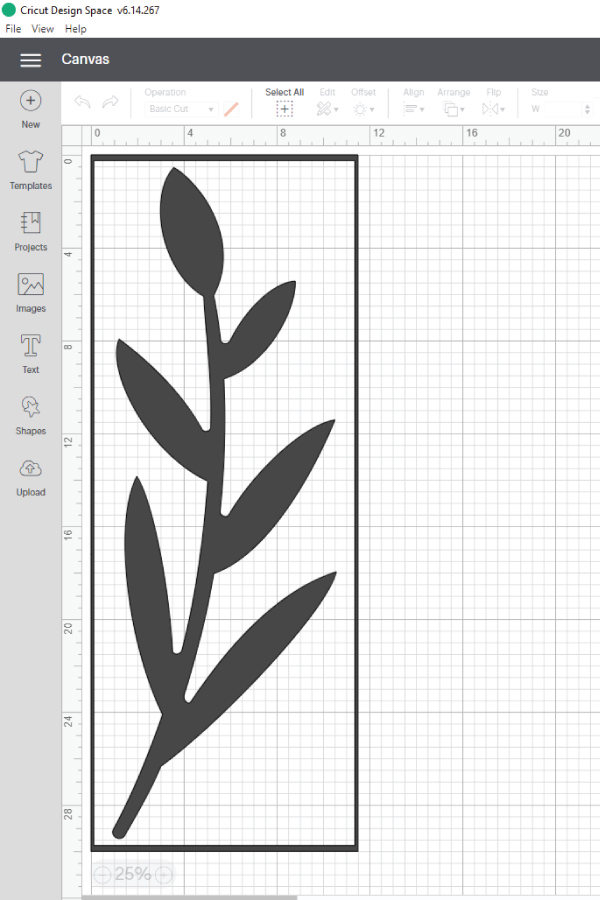
- After that, resize the design as per your choice and prepare it for cutting.
- Then, choose the material and load it with or without a mat onto your cutting machine.
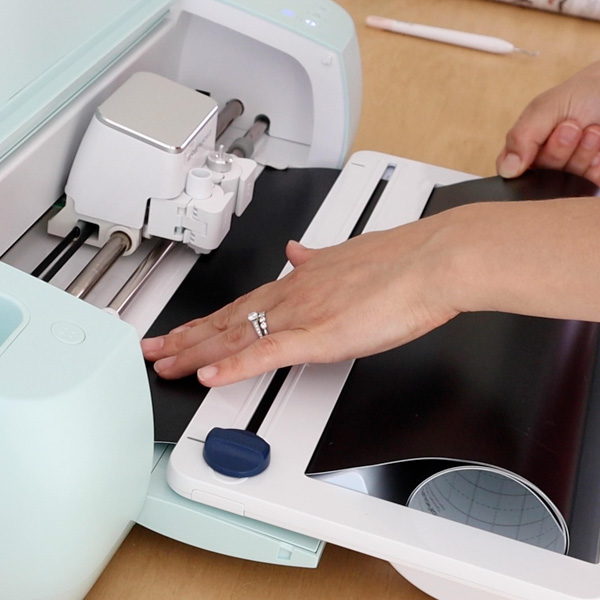
- On the Design Space app, click on the Make It option to start the design cutting.
- Once the leaf design cut on the material is complete, then unload it from the machine.
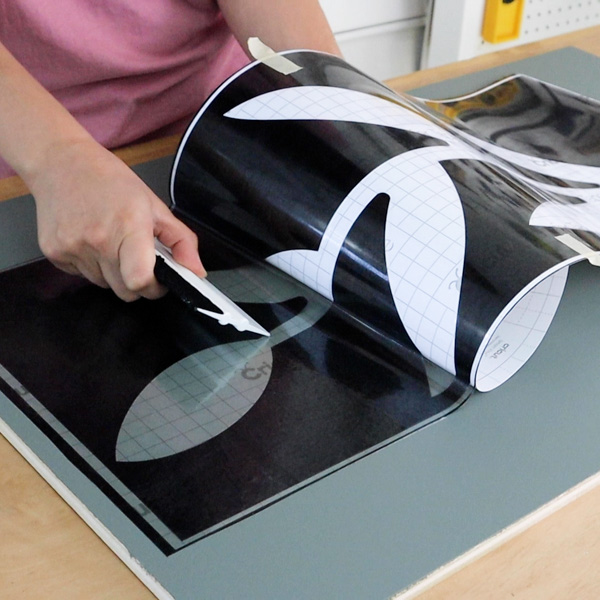
- With the help of the weeding tools, separate the design and extra parts.
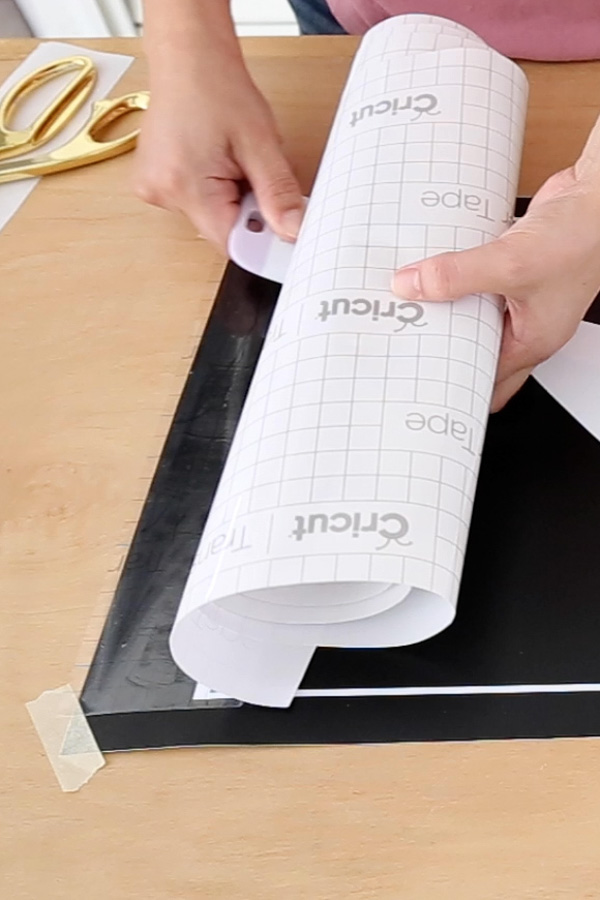
- After that, apply the transfer tape to the design.
Step 3: Apply Your Stencil Design on the Wooden Board
- Start from one corner and then carefully peel off.
- Then, you have to remove the transfer tape from the Cricut wood signs board.
- Once the material is applied correctly, it will look like the picture below.
- Now, apply the white paint to your design.
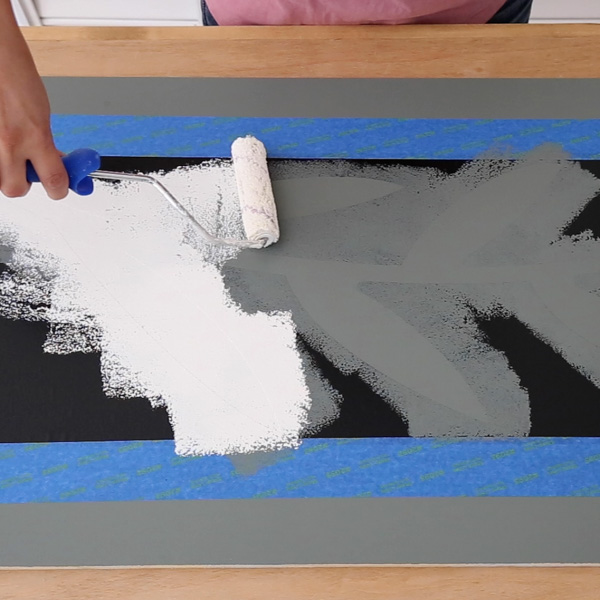
- When the paint is dried, then attach the lumber with the help of the nails.

- Finally, your first wooden sign with the Cricut Explore 3 machine will be ready.
Important Note: You can use this guide to create a large number of wood signs if you want.)
Conclusion
Here, I shared all the essential knowledge to create the Cricut wood signs with the help of your Cricut Explore 3 cutting machine. You can use this guide to create your first-ever wood DIY craft without taking any professional service. Also, you can understand the process and create a wood sign as per your creativity and imagination. So, grab your crafting supplies and start working on the Explore 3 wood sign right away.
Frequently Asked Questions
Q.1 How Do I Make Wood Signs With Cricut Explore 3?
These are the steps you have to follow to create Cricut wood signs on your Explore 3 machine.
- Before you start making the wood sign on an Explore 3, you have to connect it first.
- To connect it, you have to download the Cricut Design Space app on your PC/phone.
- Next, open the Cricut app on the same device and open a new canvas.
- On the canvas, upload a design or create a device using the app resources.
- When the design is complete, choose the material and prepare it for cutting.
- After loading the chosen material, upload it onto your Explore 3 machine.
- Once the cut is complete, you can apply the design on a wooden board.
Q.2 What Are the Basic Tools Requirements to Make a Wood Sign On Cricut Explore?
Here are some basic supplies you must have to create Cricut wood signs. Also, the supplies can vary depending from one project to another project.
● Any Cricut Explore machine
● Scraper & Weeding tools
● Painter’s tape and Transfer tape
● Wooden board
● 1 1/4″ Brad nails
● Cricut Design Space app
● Primer and Paint (To paint the background and lettering.)
● Wood Stain
● Wood Glue, and many more.
Q.3 Can You Cut Wood With Cricut Explore 3?
Cricut Explore 3 is the latest and the most advanced machine in this series the brand offers. This machine is equipped with smart features and comes with robust power to provide flawless, brand-like results. It can also cut a plethora of materials such as paper, cardstock, metals, glass, leather as well as wood. With the help of this machine, you can create various wood sign projects. Plus, the Explore 3 machine works with the additional tools to make embossed wood signs.
Visit: www.cricut.com/setup login
Source: https://cricuts-mart.com/how-to-make-a-wood-sign-with-cricut-explore-3-full-guide
Discussions
Become a Hackaday.io Member
Create an account to leave a comment. Already have an account? Log In.